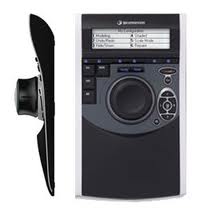
PowerSDR supports 3D Connexion devices such as the Space Navigator for control of tuning your SDR radio. If you are not familiar with 3D Connexion devices, they are basically a large knob that sits on your desktop. The Space Navigator series is primarily the knob surrounded by a cool blue lighted ring with 2 buttons on the side. The Space Pilot series is the knob mounted in a larger case with more buttons that can be mapped and a display that shows the mappings. The knob twists (does not turn), can be pushed up, down, left, right, pulled up, and pushed down to control objects in 3D environments. The devices purpose is primarily to be used with 3D drawing programs. They are a lot of fun with applications such as Google Earth. The thing to remember is that unlike a lot of desktop controllers it can’t be mapped to work with just any old Windows or Mac program. The applications have to have a plugin from the software developer installed to allow the knob to be used to control the program. However, you can map the buttons for your own use to most any program. Hopefully 3d Connexion will make a more general purpose driver available in the future. Right now the drivers support several operating systems including Windows 7.
Fortunately, PowerSDR 2.016 has the 3d Connexion plugin in built in to allow the 3d Connexion device to be used. By twisting device left or right you can tune the radio in PowerSDR. The further you twist it, the faster it tunes. By pushing the knob up or
PowerSDR will tune the radio in very fine increments. The 3d Connexion device works very well for tuning the radio in PowerSDR. The only oddities I noticed so far was that the PowerSDR software did not automatically find the 3d Connexion device until I reset the database. Also, I could not get the Panadapter Flight mode to do anything. However, it may just be me.
I wanted to focus on the Space Pilot series for additional control of the PowerSDR software and other amateur radio programs. The Space Pilot series include additional buttons that can be mapped to control the various functions of the software. For example you can map the MOX feature to a button press. The great thing about the Space Pilot series is that it will display on the LCD screen what function each button is mapped to. This is nice for folks like me who can’t remember what button I mapped to what key. There are two versions of the Space Pilot series. The Space Pilot is the older version of the device and now discontinued. The Space Pilot Pro is the new version with a color LCD screen. For this application I would highly recommend the original Space Pilot due to its cost and more versatility in its button mapping abilities. You can find the original Space Pilot used for less than $125 on Ebay. I would not pay much more than that for one since they have been discontinued. You just have to be patient, they are posted frequently, but go fast. I was able to find one for $28 shipped that had a small cosmetic issue that I fixed in 5 minutes. I would also stay away from any that say they won’t calibrate, because this may mean the encoder or electronics have an issue.
Key mapping with the Space Pilot software is very simple to accomplish with the included software downloadable from 3d Connexion. You can map and label the 6 keys under the LCD screen so that the functions you mapped to it are shown along with the name of the configuration. You can also map several other keys on the Space Pilot control panel, but their functions won’t be shown on the LCD screen. You can create several configurations for the same program if you would like to have the LCD screen show more than 6 key mappings. Any program that has keyboard shortcuts can be mapped with the utility. On the Space Pilot, the Config button will allow you to rotate through your various configurations. Lets say you are running PowerSDR and DM780 for PSK31 at the same time. The Space Pilot knob will always control the PowerSDR tuning since it has the plugin to talk to the knob. When you click on the DM780 program you can bring up your config for the DM780 macros and they will show on the LCD screen. You can the press the Config button on the Space Pilot to go to the next macro screen. The Space Pilot will only control the program that has focus. The only negative side to this is that if you switch back to PowerSDR, your DM780 macro keys will still be shown until you press Config enough times to bring up your Power SDR Config settings.
There is a work around that will allow you to create Configs that have sub configurations for each program. It will also allow for automatic switching of the Configs that belong to the program that has focus. It is actually very easy to do. This is what I use so that if I click on PowerSDR, only the Configs that are used for PowerSDR are shown. If I switch to DM780 only the Configs for that program are shown.
Here are the steps from 3d Connexion forum to do this. I have adapted them for DM780 just as an example. If you have to use the registry editing part, use at your own risk. This is only necessary if you have created a configuration in the past to a given program. All programs that are not directly supported by the 3D Connexion device are assigned to any.scg. The registry step simply removes this assignment so the program will be assigned to .scg file you created. I did find that if you create sub configurations for a program you will get an extra configuration file called something like Digital Master – Your User Name. You can delete this config with the 3D Connexion configuration software when you are done.
1) Stop the 3DxWare driver. (I didn’t find this necessary)
2) Make a copy of any.scg Any.scg is under a language-specific directory under the 3DxWare directory. Make the copy there and rename the copy to Digital Master.scg
3) Edit Digital Master.scg with notepad.
4) Change the APPLICATION_NAME value to “Digital Master”
5) Change the EXECUTABLES value to whatever the executable name is, in this case “Digital Master.exe”.
6) Change the TRANSPORT_PROTOCOL value to WIN32_KEYBOARD.
7) Save the config file.
If you already tried to use the application with the driver, you probably already have an erroneous entry in the registry. Delete the HKCU/software/3dconnexion/3dxware/Applications/Digital Master.EXE value that probably points to something like any.scg.
9) Restart the 3DxWare driver.
10) Start DM780. The driver should choose your new Digital Master config.
11) You can now make keyboard macros and assign them to buttons in the Digital Master configuration with the 3DxWare GUI.
You can then do the same for PowerSDR.
I have included some photos of my key mappings for PowerSDR and DM780.
Enjoy


